This series of posts will show how I made four condiment totes for a local restaurant. I'm going to show most steps from rough wood to finished product as many of my readers are beginners and haven't made projects this way.
The restaurant wanted holders for ketchup, mustard, relish and vinegar that the waitresses or waiters could take to the table with them. (In Canada, some of us like white vinegar on our fries. On my trips to the U. S., I have had strange looks in restaurants when I've asked for vinegar, so I've given up doing that).
I first made a prototype to see if it would be appropriate.
Upon returning to the restaurant, my sample was a little bit too long, so it was decided to shorten it, so it would hold the condiments but not have much extra space. This way it would also take up less space on the tables.
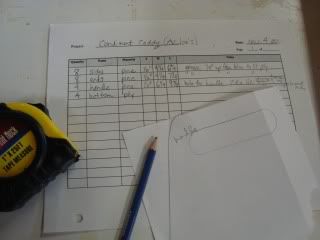
The next step was to make out a Project "parts" sheet:
On this sheet I list how many are needed of each part, and the sizes needed. This way when I go to my stack of wood I can figure out how much to prepare.
This is my stock of rough pine. It's about 6" wide and 1 1/4" thick and rough on all sides, meaning no smooth sides. I prefer working with wood like this. I can make it whatever size I need and find a satisfaction in taking the wood from rough boards to a finished product.
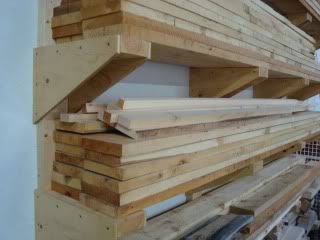 |
| You can read how I made my lumber rack here |
When looking at my parts list I see, for example, I need 8 sides at 6 3/4" long. Each board is checked over to see how the different pieces I need might fit best on it. I always allow a bit extra for knots or splits, so might allow 8" for those 8 pieces and therefore I'd need a piece 8x8"= 64" long for the sides. I find that length long to manoeuvre so I prefer two pieces at 32" for the sides.
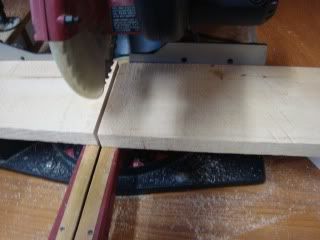
The boards are cut to a manageable length on my sliding compound mitre saw:
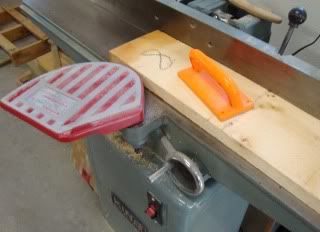
The next step is to joint all the boards. Jointing makes one face flat and is done on the jointer:
Once one face is flat and smooth, the board is turned up on it's edge to get a smooth edge that is perpendicular to the smooth face:
Now, normally I would go to the planer to get the other face of the wood smooth, but I only need my pine to be 1/2" thick. To plane from 1 1/4" down to 1/2" is not only a lot of work, but also a waste of wood, so...
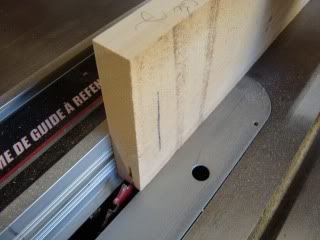
I make my wood thinner. Unfortunately I don't have a bandsaw, which is the proper tool for the job, so I use my table saw. First I cut the second edge parallel to the first, as wide as I can get the board, in most cases around 5 1/2". Now there is one smooth face and two smooth perpendicular edges.
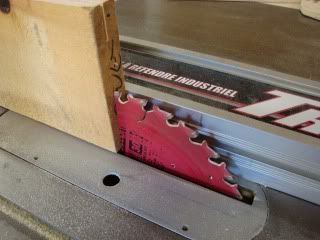
To narrow the wood, which is called "resawing," I put the fence at over 1/2", probably about 9/16" (just under 5/8") and start with a cut about 1" high.
I flip the board and do the other edge, always leaving the smooth face against the fence.
*NOTE: This is not for the faint-of-heart since the blade is fully exposed. Before performing this type of operation you must know exactly how the wood can react and what to do and not to do. (Not for beginners)*
Progressively I raise the blade so that my saw is not cutting through too much at once:
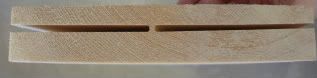
I keep going until there is just a small band of wood left in the middle:
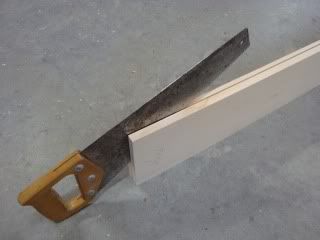
I use a handsaw to cut that small strip of wood out of the middle of each board:
...to be continued... PART 2
Showing this at the following blogs:
Labels: home accessories, pine, tote